

Installing Concrete5 PHP CMS is simple. This guide will help you through each step.
Concrete5 is a flexible and user-friendly content management system (CMS). It allows you to create and manage a website with ease. If you are new to Concrete5, don’t worry. This guide will provide clear instructions to get you started. By following these steps, you’ll have your Concrete5 CMS up and running in no time.
Whether you are a beginner or have some experience with CMS, this updated 2025 guide will make the installation process smooth and straightforward. Let’s dive in and set up your Concrete5 PHP CMS!
Introduction To Concrete5
Hey friends! Today, we’re going to talk about Concrete5. If you’re looking for an easy way to create and manage websites, Concrete5 might just be what you need. But first, let’s get to know a bit more about it.
What Is Concrete5?
Concrete5 is a content management system (CMS). Think of it like a big toolbox for building websites. It helps you create and manage your website easily, without needing to know how to code. You get to design your site the way you want, and it keeps everything organized for you.
Benefits Of Using Concrete5
Why choose Concrete5? Let me tell you some of the best things about it:
- User-Friendly: It’s easy to use, even for beginners. You don’t need to be a tech wizard to get started.
- Flexible: You can customize your site a lot. Add pages, change designs, and more.
- Secure: It has good security features to keep your site safe.
- Community Support: There are lots of people out there who use Concrete5. You can find help and tips easily.
I remember the first time I used Concrete5. I was nervous because I had no idea how to build a website. But guess what? It was so simple! Within a few hours, I had my site up and running. And the best part? I did it all by myself!
Now, you know a bit more about Concrete5. In the next sections, we’ll dive into how to install it and get your website started. Stay tuned!
System Requirements
Before diving into the installation of Concrete5, it is essential to ensure your system meets the necessary requirements. Proper system requirements guarantee a smooth installation process and optimal performance of the CMS. This section outlines the key system requirements needed for installing Concrete5 in 2025.
Server Requirements
Your server must have a few critical specifications. Firstly, it should run on a Unix-based operating system, such as Linux. Although Windows servers can work, Unix-based systems provide better performance and security for Concrete5.
Additionally, ensure your server has at least 2GB of RAM. This helps handle the CMS’s operations efficiently. A minimum of 4GB of free disk space is also necessary. This space accommodates the CMS files and your website’s content.
Php And Database Compatibility
Concrete5 requires PHP 8.0 or higher. Ensure your server uses a compatible PHP version. Running the CMS on older PHP versions may cause errors or security issues.
For database management, Concrete5 supports MySQL 5.7 and higher. Alternatively, you can use MariaDB 10.2 or higher. These database systems provide reliable data storage and retrieval for your website.
Ensure you have the necessary PHP extensions enabled. Commonly required extensions include cURL, GD, and mbstring. These extensions help Concrete5 run smoothly and support various functionalities.
Preparing Your Server
Get your server ready for the latest Concrete5 PHP CMS. Follow these steps to ensure a smooth installation in 2025. Proper preparation ensures optimal performance and security.
Hey friends, today I’ll show you how to get your server ready for installing Concrete5 PHP CMS. It’s not as hard as it sounds. You just need to follow a few steps. By the end of this, your server will be all set. Ready to dive in?
Installing Apache/nginx
First things first. We need a web server. Apache or Nginx are popular choices. Let’s break it down. For Apache: 1. Open your terminal. 2. Type: `sudo apt-get update` 3. Then: `sudo apt-get install apache2` 4. Check if it’s running: `sudo systemctl status apache2` For Nginx: 1. Open your terminal. 2. Type: `sudo apt-get update` 3. Then: `sudo apt-get install nginx` 4. Check if it’s running: `sudo systemctl status nginx` Pretty easy, right? Let’s keep going.
Setting Up Mysql Database
Next up, we need a database. MySQL is perfect for this. Here’s how you do it: 1. Open your terminal. 2. Type: `sudo apt-get install mysql-server` 3. Secure your installation: `sudo mysql_secure_installation` Then, create a database for Concrete5: 1. Log in to MySQL: `sudo mysql -u root -p` 2. Create a database: `CREATE DATABASE concrete5;` 3. Create a user: `CREATE USER ‘c5user’@’localhost’ IDENTIFIED BY ‘password’;` 4. Grant all privileges: `GRANT ALL ON concrete5. TO ‘c5user’@’localhost’;` 5. Flush privileges: `FLUSH PRIVILEGES;` 6. Exit: `EXIT;` And there you go. Your server is now ready for the next steps. By the way, when I first did this, I was a bit nervous. But trust me, once you get the hang of it, it’s a piece of cake. Stay tuned for the next part where we will dive into downloading and setting up Concrete5. Happy server prepping! “`
Downloading Concrete5
Downloading Concrete5 is the first step in setting up your new CMS. Concrete5 is a powerful tool for creating websites. It is crucial to download it from a trusted source to ensure security and reliability.
Official Download Sources
Always get Concrete5 from the official website. Visit the Concrete5 website and navigate to the download section. Look for the latest version available for download. This ensures you get the most recent updates and features.
You can also find Concrete5 on GitHub. The official Concrete5 GitHub repository offers the source code. This is especially useful for developers who want to customize the CMS.
Verifying The Download
After downloading, it is important to verify the file. This step ensures the file is safe and not corrupted. Most official sources provide a checksum or hash value.
Compare the downloaded file’s hash value with the one provided. Use a tool like MD5 or SHA-256 to generate the hash of your file. If the values match, your file is intact and safe to use.
Uploading Files To Server
Uploading files to the server is a crucial step in installing Concrete5 CMS. It involves transferring the CMS files from your local computer to your web hosting server. This process ensures that the CMS is accessible online and ready for installation.
Using Ftp/sftp
First, choose an FTP or SFTP client. Popular options include FileZilla and WinSCP. Download and install your chosen client. Open the client and enter your server credentials. This usually includes your hostname, username, and password.
Connect to your server. Navigate to the directory where you want to install Concrete5. Usually, this is the public_html or www folder. Locate the Concrete5 files on your local computer. Select all the files and drag them into the server directory. The upload process will begin. Wait until all files are transferred.
Setting Correct Permissions
After uploading the files, you must set the correct permissions. This step ensures that Concrete5 can read and write necessary files. In your FTP client, right-click on the uploaded folder. Choose the option to change permissions.
Set the folder permissions to 755. This allows the server to execute the files while keeping them secure. For files within the folder, set the permissions to 644. This ensures that files are readable and writable by the server, but not executable.
Verify that all permissions are correctly set. Incorrect permissions can cause installation issues. Once permissions are set, you can proceed with the Concrete5 installation process.
Running The Installer
Hey there! So, you’ve got your Concrete5 files ready and your server set up. Great! Now, it’s time for the exciting part – running the installer. This is where we make Concrete5 come to life on your website. Let’s dive in!
Accessing The Installer
First things first, you need to access the installer. This is super easy. Just open your web browser and type in the URL where you uploaded your Concrete5 files. It should look something like this: http://yourdomain.com. Press Enter and voila! You should see the Concrete5 installer screen.
Here’s a quick checklist to make sure you’re ready:
- Your server is set up and running.
- You’ve uploaded all Concrete5 files to your server.
- You have your database details handy.
Completing Installation Steps
Now, let’s go through the installation steps. Don’t worry, it’s straightforward.
- Choose Your Language: The first screen will ask you to select your language. Pick your preferred language and click “Next”.
- Check Requirements: Concrete5 will now check if your server meets all the requirements. If everything is good, you’ll see a green checkmark. If not, fix the issues and refresh the page.
- Database Information: Enter your database details. This includes the database name, username, password, and host. Click “Next” after filling in the details.
- Site Information: Here, you’ll enter your site name and admin details. Make sure to use a strong password for your admin account.
- Install: Finally, click the “Install” button. The installer will now set up your Concrete5 site. This might take a few minutes, so grab a coffee and relax.
Once the installation is complete, you’ll see a success message. Congratulations! Your Concrete5 site is now up and running.
Need a quick recap?
- Access the installer through your web browser.
- Follow the step-by-step installation guide.
- Enter your database and site information.
- Click “Install” and wait for the magic to happen.
And that’s it! You’ve successfully installed Concrete5. If you have any questions, feel free to leave a comment below. Happy building!
Post-installation Setup
After installing Concrete5, the next step is the post-installation setup. This process ensures your website runs smoothly and meets your needs. This guide will help you configure site settings and add essential plugins. Let’s get started with the first step.
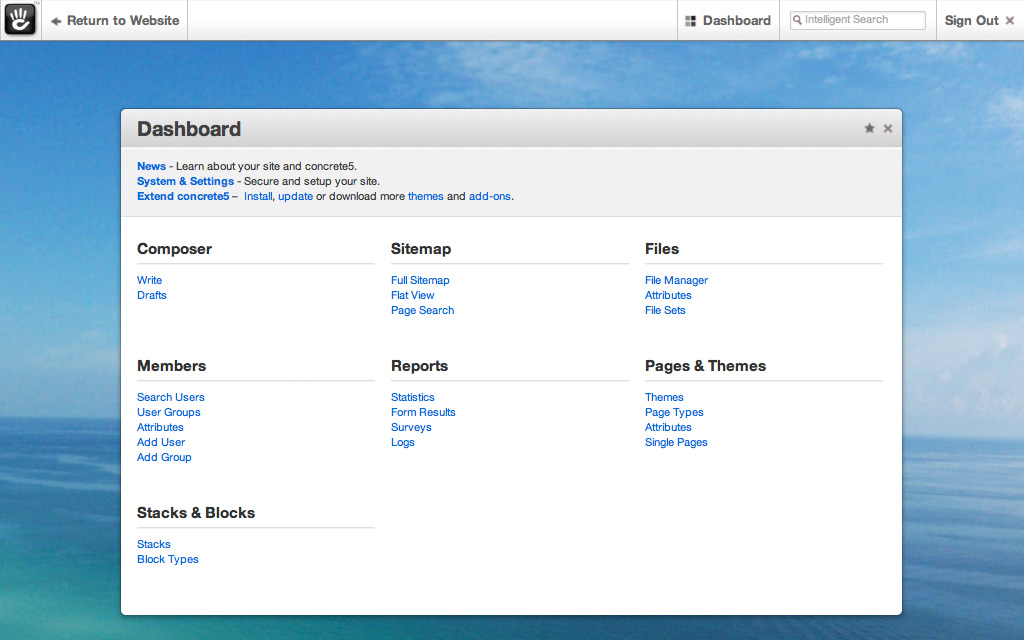
Configuring Site Settings
First, log in to your Concrete5 dashboard. Navigate to the ‘System & Settings’ section. Here, you can set your site name and time zone. Ensure you choose the correct language for your audience.
Then, head over to ‘SEO & Statistics’. Enable SEO-friendly URLs to improve your site’s visibility. Update your site title, meta description, and keywords. These elements help search engines understand your site content better.
Next, go to ‘Permissions & Access’. Adjust the user roles and permissions as needed. This step ensures only authorized users can make changes. Secure your site by limiting access to sensitive areas.
Adding Essential Plugins
Plugins enhance the functionality of your site. Start with the ‘Extend Concrete5’ section in your dashboard. Browse the marketplace for essential plugins.
Install a security plugin to protect your site from threats. A backup plugin is also crucial. It helps you restore your site if something goes wrong.
Consider adding a contact form plugin. This allows visitors to reach you easily. An SEO plugin can further optimize your site for search engines.
After installing plugins, configure their settings. Make sure they align with your site’s needs and goals. Test each plugin to ensure it works correctly.
Troubleshooting Common Issues
Installing Concrete5 PHP CMS can sometimes present challenges. Knowing how to troubleshoot common issues will save time and frustration. This guide will help you address typical problems during installation and optimize performance.
Installation Errors
Installation errors often occur due to server settings or missing dependencies. First, ensure your server meets all the Concrete5 requirements. Check PHP, MySQL, and Apache versions. They should match the Concrete5 specifications.
Sometimes, file permissions cause problems. Ensure the ‘application/files’ directory is writable. This step is crucial for a smooth installation.
If you encounter a blank page, enable error reporting in your PHP settings. This will display errors, making it easier to identify the problem. You can do this by editing the ‘php.ini’ file or adding the following lines to your ‘.htaccess’ file:
php_flag display_startup_errors on
php_flag display_errors on
Performance Optimization
Once installed, you may notice performance issues. Optimizing your Concrete5 setup can improve speed. Start by enabling caching. This reduces the load on your server.
Navigate to the ‘System & Settings’ section. Then, go to ‘Cache & Speed Settings’. Enable all caching options available. This will help your site run faster.
Database optimization is another key step. Use tools like phpMyAdmin to optimize database tables. This can reduce load times and improve overall performance.
Finally, consider using a Content Delivery Network (CDN). A CDN distributes your content across multiple servers worldwide. This reduces latency and speeds up content delivery to your users.
Securing Your Concrete5 Site
Hey friends, today we’re going to talk about something super important – keeping your Concrete5 site safe. You don’t want any trouble, right? This guide will show you easy steps to secure your site. Let’s dive in!
Regular Backups
Think of backups like a safety net. If something goes wrong, a backup can save you. Here’s why they matter:
- Peace of mind: Knowing you have a backup means you can relax a bit.
- Quick recovery: If your site gets hacked or crashes, you can restore it fast.
How often should you backup? Well, it depends. If your site changes daily, daily backups are good. If not, weekly might work. Here’s how to do it:
- Log in: Go to your Concrete5 dashboard.
- Go to System & Settings: Find this under the gear icon.
- Backup: Click on “Backup” and follow the steps.
That’s it! Easy, right?
Security Best Practices
Now let’s talk about some best practices. Following these can keep your site safe from bad guys.
- Update regularly: Always keep your Concrete5 and plugins up to date. Updates fix security holes.
- Strong passwords: Use strong, unique passwords. No “password123” here!
- Limit access: Only give access to people who need it. Less access means less risk.
Here’s a simple example from my own experience. I once used a weak password and guess what? My site got hacked. It was a mess. I learned my lesson and now, strong passwords only!
Another tip? Use a security plugin. There are many out there that can help. They add an extra layer of protection.
Remember, keeping your site secure is like locking your house. It’s necessary and keeps your stuff safe. Follow these steps and you’ll be in good shape!
Conclusion
Installing Concrete5 PHP CMS is straightforward with this guide. Follow the steps carefully. Ensure all requirements are met before starting. This ensures smooth installation. Concrete5 offers a robust, user-friendly platform for website creation. Enjoy building and managing your site. Remember to keep your CMS updated.
This maintains security and functionality. Happy building with Concrete5!